
10 Compelling Reasons Why You Need Plumbers Scotland
Discover just how to fit a bathroom with this professional guide, consisting of step-by-step guidelines and video.
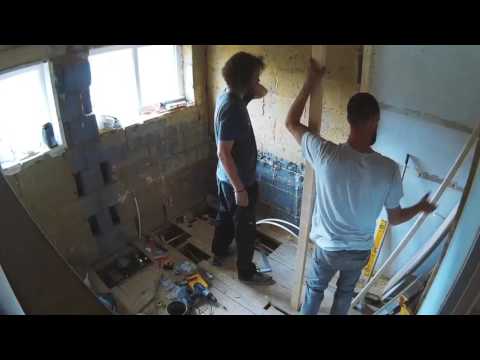
Whilst saving money on your washroom setup price might seem a good concept, fitting a bath is best entrusted to a expert tradesperson with experience in this kind of work. They will guarantee it is fitted as well as plumbed properly, so you do not experience any kind of problems further down the line.
You'll find a wide variety of baths at VictoriaPlum.com, in all manner of forms, dimensions as well as designs to suit your demands. For instance:
Straight baths (either single or dual finished).
Shower baths (P formed or L designed).
You can discover suitable guidelines for various other bathroom products by clicking the web links below:.
How to fit an acrylic bath panel.
Exactly how to fit a wood bathroom panel.
Exactly how to fit a bath screen.
How to fit a bath mixer faucet.
How to fit bathroom taps.
For the functions of this how-to overview, we'll be considering suitable a straight bathroom.
What is a straight bathroom?
A straight bath is one of one of the most common bathrooms you'll discover in the UK. Usually created out of acrylic or in some cases steel, it rests on legs which are then concealed by bath panels. Touches are discovered either at one end (in a solitary finished bathroom) or on one side (in a dual ended bath).
Orchard square side solitary finished directly bathroom.
The Orchard square edge bath is a good example of straight, solitary ended bath.
Before you do anything.
Constantly unpack your bathroom instantly after shipment. Look for any damage or faults as it's better to discover them now, as opposed to during installment.
Constantly switch off your water at the mains before trying any kind of Do It Yourself in the restroom.
Tools you'll need:.
Flexible wrench.
Electric drill with hole cutter.
Hack saw.
Pencil.
Pipeline cutter.
Sealant gun.
Spirit level.
Requirement screwdrivers.
Measuring tape.
Check you have the following:.
Usually provided with bathroom:.
Bath tub.
Adjustable feet.
Wall surface taking care of braces.
Manages (if supplied).
May need to get individually:.
Bath waste.
Bath tap( s).
Will require to get individually:.
Silicone sealant.
Time to complete:.
1 day.
Just how much will a Tradesperson usually charge?
₤ 190-- ₤ 220 ( cost may differ-- find out more concerning washroom fitting expenses).
Fitting your straight bath.
At Victoria Plum, you'll find a lot of our straight bathrooms are crafted from top quality, acrylic that's warm to the touch, and has outstanding effect and scratch-resistance for outstanding durability.
The adhering to video and also instructions are for suitable a straight bathroom:.
Here is just how to fit a bathroom.
Action 1.
Place your bathroom on a degree surface area.
Removing the installations box.
Action 2.
Remove the fittings box (usually affixed to the underside of the bathroom) and also inspect you have all the parts.
Inspecting all components.
Step 3.
It's ideal to remove the protective cardboard and also plastic film at this phase (although you can choose to keep them in position till you've fitted the legs, to help shield the bath). Examine your bath carefully for any problems and inspect the colour suit is acceptable to your collection and any panels.
If you're dissatisfied with your bath at this phase, please call our Customer Treatment Team making use of LiveChat immediately ( supplying you got the bathroom from Victoria Plum). Any refixing prices, cases for wrong colour suit, Plumbers Scotland and/or any other faults AFTER installation, will not be accepted.
Removing packaging.
Tip 4.
If the bath has deals with, fit them currently.
Affixing braces.
Step 5.
Affix the brackets to the bottom of the bath and deal with the legs into the corresponding openings.
Taking care of bath legs.
Step 6.
Fit the centre leg bracket and also the leg itself. You must have all of the legs at roughly the very same elevation before standing the bathroom upright.
Checking legs are just the same height.
Step 7.
Location the bathroom against the wall and also examine that it's level, adjusting the height of the legs as essential.
Convenient hint: Take a couple of wood battens approximately 60mm vast and stand the bathroom on these to assist secure your floor. If laid on floorboards, these should go to 90 levels to the joists.
Checking the bath is level.
Step 8.
Relocate the bath far from the wall as well as affix the wall surface fixing braces to the side of the bath.
Affixing the wall taking care of braces.
Step 9.
It's now time to fit the bath taps. Check out our "how to fit bathroom faucets" guide for instructions.
Suitable bathroom taps.
Step 10.
Protect the bath waste in position using the washers provided. A slim grain of silicone can assist keep the seal watertight for longer.
Protecting the bath waste.
Action 11.
Fix the overflow right into placement.
Dealing with the overflow in place.
Step 12.
Once fitted, position the bathroom against the wall and secure it making use of the wall braces attached previously.
Deal with utilizing the wall brackets.
Tip 13.
Your bath is currently all set to be plumbed in as well as secured. We encourage looking for the aid of a specialist for this.
Bathroom ready to be plumbed in and also sealed.
Congratulations, you've now fitted your straight bathroom.
Whilst Do It Yourself can be a excellent way to save money and time, you need to constantly work with a qualified expert to plumb as well as fully install your items. The guidelines over are just a overview to suitable your brand-new bath as well as should not be used to attempt complete pipes and setup.
If you wish to publish these directions off, see our printer-friendly version below.
Place your bathroom on a degree surface.
Eliminate the installations box ( typically affixed to the bottom of the bath) as well as inspect you have all the parts.
It's best to get rid of the safety cardboard and also plastic film at this stage (although you can select to maintain them in position until you have actually fitted the legs, to aid protect the bath). Check your bath carefully for any type of damages as well as check the colour suit serves to your suite as well as any panels.
If the bath has handles, fit them currently.
Attach the brackets to the bottom of the bathroom and also repair the legs into the equivalent holes.
Fit the centre leg bracket and the leg itself. You need to have all of the legs at roughly the very same height before standing the bath upright.
Location the bathroom against the wall surface as well as inspect that it's level, readjusting the elevation of the legs as required.
Move the bath away from the wall and connect the wall dealing with braces sideways of the bathroom.
It's now time to fit the bathroom taps.
Protect the bathroom waste in place making use of the washing machines given. A slim bead of silicone can help maintain the seal watertight for longer.
Take care of the overflow right into position.
Once fitted, put the bathroom against the wall surface and secure it using the wall surface brackets attached earlier.
Your bath is currently ready to be plumbed in and sealed. We encourage seeking the aid of a expert for this.
